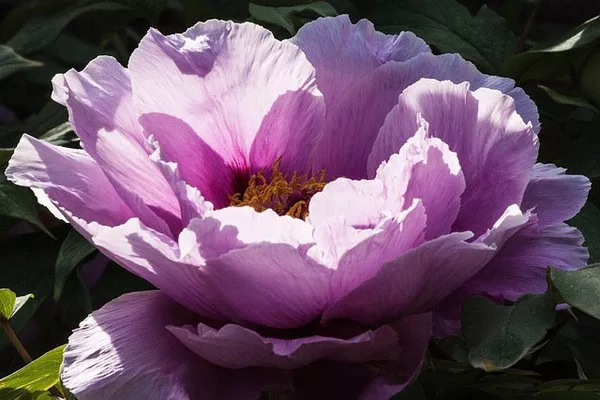
Paper flowers have become a popular choice for decorations, gifts, and even bridal bouquets. Among the vast array of paper blooms, peonies stand out for their lush, layered petals and captivating beauty. Crafting paper peonies allows you to bring the elegance of these blooms into your home or event decor, offering a timeless charm that lasts far beyond their fresh counterparts. In this comprehensive guide, we’ll walk you through the process of creating stunning paper peony flowers, from selecting materials to assembling each delicate petal with care.
Materials Needed
Before diving into the crafting process, gather the following materials:
Crepe paper in various shades (light pink, dark pink, and green for leaves)
Floral wire
Floral tape
Scissors
Craft glue
Template for peony petals (available online or create your own)
Pencil
Styrofoam ball (optional, for creating a base)
Step 1: Prepare Your Workspace
Choose a well-lit and spacious area to work on your paper peonies. Lay out all your materials and tools neatly to ensure easy access throughout the crafting process. Clear any clutter from your workspace to prevent distractions and facilitate smooth crafting.
Step 2: Cut Out Petal Templates
Using your chosen template or creating your own, trace and cut out the peony petal shapes from the crepe paper. You’ll need multiple petals of different sizes to create the full, layered look of a peony flower. Aim for a mix of larger outer petals and smaller inner petals to achieve a natural appearance.
Step 3: Shape the Petals
Once you have all your petals cut out, gently curl the edges using your fingers or a round-tipped tool. This will add dimension and realism to your paper peony petals, mimicking the soft curves of real flower petals. Be careful not to crease the paper as you shape the petals, as this can detract from the final result.
Step 4: Form the Peony Center
To create the center of your paper peony, take a small piece of crepe paper and crumple it into a tight ball. This will serve as the base onto which you’ll attach the first layer of petals. Alternatively, you can use a small Styrofoam ball as a more structured center for your flower.
Step 5: Attach the First Layer of Petals
Starting with the larger outer petals, apply a small amount of craft glue to the base of each petal and carefully position them around the center of your peony. Overlap the petals slightly to create a natural, layered effect. Continue adding petals until you’ve completed the first layer, ensuring that they are evenly spaced around the center.
Step 6: Build Up the Layers
As you move to the inner layers of petals, gradually decrease the size of the petals to create a realistic progression from larger outer petals to smaller inner petals. Attach each layer using the same method as before, overlapping the petals slightly to create depth and dimension.
Step 7: Add Details and Texture
To enhance the realism of your paper peony, consider adding details such as small folds or creases to the petals. You can also use a contrasting shade of crepe paper to create highlights and shadows, giving your flower a lifelike appearance. Experiment with different textures and techniques to achieve the desired effect.
Step 8: Create Leaves and Stem
Using green crepe paper, cut out leaf shapes to accompany your paper peony. Attach them to floral wire using floral tape, shaping the wire to mimic the natural curve of a peony stem. Arrange the leaves around the base of the flower, securing them in place with additional floral tape if necessary.
Step 9: Final Touches
Once you’re satisfied with the arrangement of petals and leaves, take a moment to inspect your paper peony for any loose ends or imperfections. Trim any excess paper or stray glue strands to achieve a polished finish. You can also gently adjust the shape of the petals and leaves to perfect the overall appearance of your flower.
Step 10: Display and Enjoy
Congratulations, you’ve successfully crafted a stunning paper peony flower! Whether you’re using it as a standalone decoration or incorporating it into a larger arrangement, your paper peony is sure to captivate and delight. Display it proudly in your home, use it to adorn gifts or special occasions, and enjoy the beauty of your handmade creation for years to come.
Conclusion
Crafting paper peony flowers offers a creative and rewarding way to bring the timeless beauty of these blooms into your life. With just a few simple materials and a little patience, you can create stunning paper peonies that rival their fresh counterparts in elegance and charm. Whether you’re a seasoned crafter or just starting out, this step-by-step guide provides all the information you need to create your own breathtaking paper peony flowers. So gather your supplies, clear your workspace, and let your creativity blossom as you embark on this delightful crafting journey.


