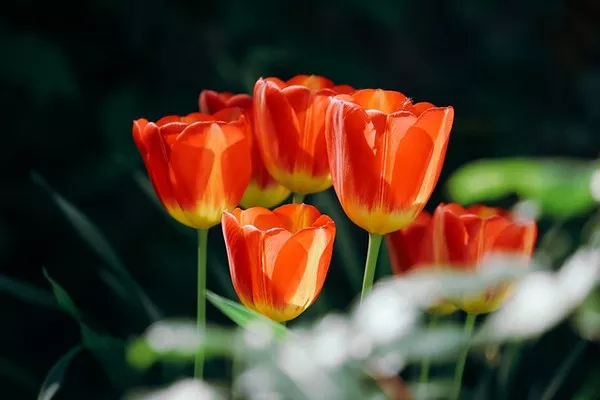
Flowers, with their delicate petals and vibrant colors, are not just fleeting beauties meant to be admired for a moment before they wither away. With the right techniques, you can preserve their splendor for much longer, allowing you to enjoy their beauty for weeks, months, or even years to come. One such method is drying flowers in the microwave—an efficient and effective way to retain their charm while extending their lifespan. In this comprehensive guide, we will explore the step-by-step process of drying flowers in the microwave, covering everything from selecting the right blooms to ensuring optimal results.
Understanding the Science Behind Microwave Drying
Before delving into the specifics of drying flowers in the microwave, it’s essential to grasp the science behind the process. Microwaves work by emitting electromagnetic radiation, which causes water molecules within the flowers to vibrate rapidly. This vibration generates heat, thereby evaporating the moisture present in the petals and stems. Unlike traditional drying methods that can take weeks, microwave drying can preserve flowers in a matter of minutes, making it an attractive option for those seeking quick and efficient results.
Selecting the Right Flowers
Not all flowers are suitable for microwave drying, as certain varieties may wilt or lose their color when exposed to high temperatures. It’s essential to choose blooms that are resilient and can withstand the drying process without compromising their appearance. Ideal candidates for microwave drying include roses, daisies, lavender, and baby’s breath, among others. These flowers tend to retain their shape and color well, ensuring a beautiful end result.
Preparation Is Key
Proper preparation is crucial for successful microwave drying. Begin by selecting fresh flowers that are free from blemishes or signs of wilting. Trim the stems to your desired length, ensuring they fit comfortably within the microwave-safe container. Remove any excess foliage or leaves that could trap moisture, as this may prolong the drying time and compromise the final outcome. Additionally, it’s advisable to wait until the flowers are fully open before proceeding with the drying process, as closed buds may not dry evenly.
Choosing the Right Container
When drying flowers in the microwave, the choice of container is just as important as the flowers themselves. Opt for a microwave-safe container that is spacious enough to accommodate the flowers without overcrowding. Glass or ceramic containers are ideal, as they can withstand the heat generated by the microwave without warping or melting. Avoid using plastic containers, as they may not be able to withstand the high temperatures required for drying flowers.
The Drying Process
Now that you’ve selected your flowers and prepared them for drying, it’s time to initiate the drying process. Follow these steps to achieve optimal results:
1. Arrange the Flowers: Place the prepared flowers in a single layer inside the microwave-safe container, ensuring that they are not touching or overlapping. This will allow for even drying and prevent the flowers from sticking together.
2. Microwave in Intervals: Set the microwave to its lowest power setting, typically around 30% to 50% power, to avoid overheating the flowers. Microwave the flowers in short intervals, starting with 30-second bursts and gradually increasing the time as needed. Check the flowers after each interval to assess their progress and prevent over-drying.
3. Rotate the Container: To ensure uniform drying, rotate the container halfway through the process. This will help distribute the heat evenly and prevent any hot spots from forming, which could cause uneven drying or scorching.
4. Monitor Closely: Keep a close eye on the flowers throughout the drying process, as microwave ovens vary in power and efficiency. Be prepared to adjust the time and power settings as needed to achieve the desired results. It’s better to err on the side of caution and under-dry the flowers than risk overheating them, which could cause them to become brittle or lose their color.
5. Test for Dryness: To determine if the flowers are adequately dried, carefully remove a sample flower from the container and allow it to cool for a few minutes. Gently press the petals between your fingers—if they feel dry and papery, the flowers are ready. If they still feel slightly moist, return them to the microwave for additional drying time.
6. Cooling and Storage: Once the flowers are fully dried, remove them from the microwave and allow them to cool completely before handling. Store the dried flowers in a cool, dry place away from direct sunlight to prevent them from fading or becoming brittle. Properly dried flowers can last for several months to a year or more if stored correctly.
Tips for Success
While drying flowers in the microwave is a relatively simple process, there are a few additional tips to keep in mind to ensure the best possible outcome:
Experiment with different flower varieties to discover which ones dry best in the microwave.
Consider adding a desiccant, such as silica gel or borax, to the container to help absorb excess moisture and speed up the drying process.
Avoid using metal containers or containers with metallic accents, as they can cause sparks or arcing in the microwave.
Use caution when handling hot containers and dried flowers, as they can retain heat and cause burns.
Conclusion
Drying flowers in the microwave offers a convenient and efficient way to preserve their natural beauty for months to come. By following the step-by-step process outlined in this guide and exercising care and patience, you can enjoy an array of dried flowers that retain their vibrant colors and delicate charm. Whether you’re creating decorative arrangements, homemade potpourri, or personalized gifts, microwave drying allows you to capture the essence of nature’s beauty and enjoy it year-round.


