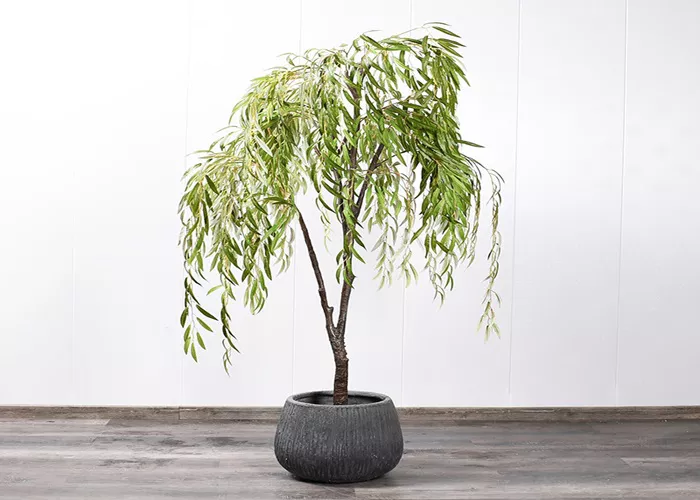
Creating a weeping willow bonsai is an art form that combines patience, precision, and a deep understanding of plant care. The weeping willow, known for its graceful, cascading branches, translates beautifully into the miniature world of bonsai. This guide will walk you through the entire process, from selecting the right materials to shaping and maintaining your bonsai. By the end, you’ll have a stunning, elegant weeping willow bonsai that will enhance any indoor or outdoor space.
Materials and Tools
Before you begin, you’ll need to gather a few essential materials and tools:
Weeping Willow Cutting: Ideally, you’ll start with a cutting from a healthy, mature weeping willow tree. This can be sourced from a reputable nursery or bonsai specialist.
Bonsai Pot: Choose a pot that is proportionate to the size of your cutting and has good drainage holes. A ceramic or porcelain pot adds an elegant touch.
Bonsai Soil: Specialized bonsai soil is designed to drain well and retain essential nutrients. You can purchase this from a bonsai supplier.
Pruning Tools: High-quality pruning shears, bypass pruners, and scissors are essential for shaping and maintaining your bonsai.
Wire and Ties: Aluminum or copper wire is used for training branches, and rubber ties or twist ties help secure the wire.
Watering Can: A small, fine-spouted watering can allows for precise watering.
Fertilizer: Use a balanced, water-soluble bonsai fertilizer.
Moss or Pebbles: For decorative purposes and to help maintain moisture levels in the pot.
Step-by-Step Guide
Step 1: Propagation
1. Prepare the Cutting
Select a healthy, vigorous branch from a mature weeping willow tree.
Cut the branch just below a node, ensuring it is at least 6 inches in length.
Remove any leaves from the bottom half of the cutting to reduce water loss.
2. Rooting the Cutting
Dip the cutting in a rooting hormone powder to stimulate root growth.
Fill a small pot with a mixture of perlite and vermiculite, which provides excellent drainage and moisture retention.
Plant the cutting in the pot, ensuring at least 2 inches of the stem is below the surface.
Water lightly and place the pot in a warm, brightly lit location but out of direct sunlight.
Keep the soil moist but not waterlogged. Roots should form within 4-6 weeks.
Step 2: Transplanting to a Bonsai Pot
1. Prepare the Pot and Soil
Fill your chosen bonsai pot with bonsai soil, leaving an inch of space at the top.
Lightly compress the soil to remove air pockets.
2. Transfer the Cutting
Carefully dig up the rooted cutting, being careful not to damage the roots.
Plant it in the center of the bonsai pot, ensuring the roots are spread out evenly.
Fill in around the roots with soil and gently firm it down.
3. Watering and Initial Care:
Water thoroughly until water drains out of the bottom of the pot.
Place the pot in a partially shaded location for the first few weeks to allow the plant to adjust.
Gradually increase sunlight exposure as the plant becomes more established.
Step 3: Shaping and Training
1. Pruning Basics
Use bypass pruners for clean, precise cuts.
Prune dead, damaged, or crossing branches first.
Trim back any branches that are growing too upright or too horizontally to encourage the cascading growth characteristic of a weeping willow.
2. Training Branches
Wrap aluminum or copper wire around the branches, starting from the base and working towards the tips.
Gently bend the branches downward to create the desired cascading effect.
Secure the wire with rubber ties or twist ties to prevent it from cutting into the bark.
Check the wire regularly and loosen or remove it as the branches thicken.
3. Regular Pruning
Continue to prune your bonsai regularly to maintain its shape.
Prune new growth back to two leaves to encourage bushier growth.
Trim the tips of branches to prevent them from growing too long.
Step 4: Maintenance
1. Watering
Water your bonsai when the top inch of soil feels dry.
Use a fine-spouted watering can to avoid splashing the leaves and to ensure water reaches the roots.
Empty the saucer under the pot after watering to prevent root rot.
2. Fertilizing
Feed your bonsai with a balanced, water-soluble bonsai fertilizer every two weeks during the growing season.
Reduce feeding during the winter months when growth slows.
3. Repotting
Repot your bonsai every 2-3 years, or when it becomes rootbound.
Choose a pot that is only slightly larger than the current one to prevent the roots from growing too quickly.
Trim any excess roots during repotting to keep the plant compact.
4. Pest and Disease Control
Regularly inspect your bonsai for signs of pests or diseases.
Treat any infestations promptly with appropriate pesticides or fungicides.
Practice good sanitation by removing fallen leaves and debris from the pot.
Step 5: Enhancing Your Bonsai
1. Adding Decorative Elements
Use moss or pebbles to cover the surface of the soil, adding to the aesthetic appeal of your bonsai.
Consider adding small decorative items like figurines or stones to create a scene.
2. Displaying Your Bonsai
Place your bonsai in a prominent location where it can be admired.
Rotate it regularly to ensure all sides receive equal sunlight and to prevent the branches from growing unevenly.
Conclusion
Creating a weeping willow bonsai is a rewarding endeavor that combines artistry and plant care. By following this comprehensive guide, you’ll be able to transform a simple cutting into a stunning, elegant bonsai that will become a cherished part of your home or garden. Remember, patience and precision are key to success. With time and care, your weeping willow bonsai will thrive and bring beauty and tranquility to your space.
Related topics:
- How to Maintain a Bonsai Tree at Home?
- How to Make a Bonsai Bamboo Plant?
- How to Plant Wisteria Bonsai Seeds?


