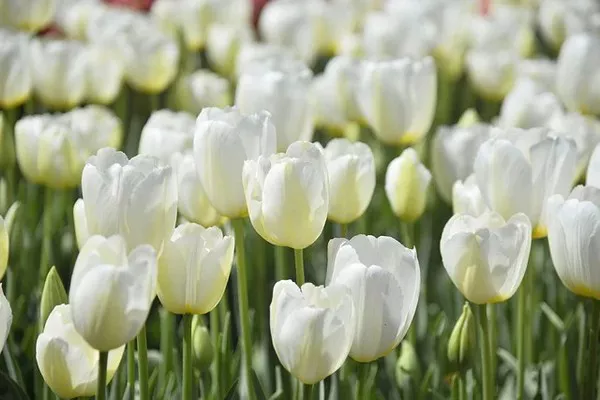
In the world of botanical preservation, pressing flowers is an age-old practice that allows us to capture the delicate beauty of blooms for posterity. Among the plethora of blossoms, tulips stand out with their vibrant colors and elegant forms. Pressing tulip flowers is a meticulous process that requires attention to detail and patience. In this guide, we will delve into the art of pressing tulip flowers, exploring techniques, tips, and the best practices to ensure optimal results.
Understanding Tulip Anatomy
Before diving into the pressing process, it’s essential to have a basic understanding of tulip anatomy. Tulips belong to the genus Tulipa and are characterized by their cup-shaped flowers and long, slender stems. Each tulip flower consists of several distinct parts:
Petals: Tulip petals are often brightly colored and come in a variety of shapes and sizes, ranging from slender and pointed to rounded and ruffled.
Stamens: The male reproductive organs of the tulip, stamens consist of a filament and an anther, which produces pollen.
Pistil: The female reproductive organ of the tulip, the pistil is located in the center of the flower and consists of the stigma, style, and ovary.
Sepals: Often mistaken for petals, sepals are the green, leaf-like structures that enclose and protect the bud before it blooms.
Choosing the Right Tulips
When selecting tulips for pressing, opt for flowers that are in full bloom but not overly mature. Look for blooms with vibrant colors and healthy petals, free from blemishes or discoloration. Avoid tulips that are wilted or beginning to fade, as they may not press well and could result in a less desirable outcome.
It’s also essential to consider the variety of tulip you’re working with. While all tulips can be pressed, some varieties may retain their color and shape better than others. Experiment with different types of tulips to find those that yield the best results.
Materials Needed
Before embarking on the pressing process, gather the necessary materials:
Fresh tulip flowers: Select a variety of tulips in different colors and sizes.
Absorbent paper: Use high-quality, acid-free blotting paper or parchment paper to absorb moisture from the flowers.
Books or flower press: Choose heavy books or a designated flower press to apply pressure evenly to the tulips.
Cardboard or cardboard inserts: Place cardboard or cardboard inserts between layers of flowers to prevent them from sticking together.
Weights: Additional weights may be necessary to apply consistent pressure to the flower press.
Pressing Techniques
Now that you have gathered your materials, it’s time to begin the pressing process. Follow these steps for optimal results:
Prepare the flowers: Trim the tulip stems to your desired length, leaving enough room to handle the flowers without damaging the petals. Remove any excess foliage or leaves that may obstruct the pressing process.
Position the flowers: Arrange the tulips on absorbent paper in a single layer, ensuring that they are not overlapping. Leave ample space between each flower to allow for proper air circulation.
Layering: Once the first layer of tulips is in place, cover them with another sheet of absorbent paper. Add additional layers of flowers and paper as needed, alternating between flowers and paper to create a stack.
Insert cardboard: Place cardboard or cardboard inserts between each layer of flowers to provide support and prevent them from sticking together.
Apply pressure: Once the stack is complete, transfer it to a flower press or between the pages of heavy books. Apply pressure evenly across the stack, ensuring that the flowers are pressed flat.
Drying time: Allow the tulips to dry for at least two to three weeks, checking periodically to ensure that they are drying evenly. You may need to replace the absorbent paper if it becomes saturated with moisture.
Final touches: Once the tulips are fully dried, carefully remove them from the press or books. Use tweezers or a delicate touch to handle the pressed flowers, as they can be fragile. Trim any excess paper or cardboard from around the edges of the flowers.
Tips for Success
Pressing tulip flowers requires precision and care. Here are some additional tips to help you achieve the best results:
Timing is key: Press tulip flowers soon after they have reached full bloom to capture their vibrant colors and delicate petals.
Avoid moisture: Moisture can cause the flowers to rot or develop mold during the pressing process. Ensure that the flowers are completely dry before pressing them and store them in a cool, dry place throughout the pressing process.
Experiment with different techniques: There are various methods for pressing flowers, including using a flower press, books, or even a microwave. Experiment with different techniques to find the one that works best for you.
Consider the end use: Think about how you plan to use the pressed tulips. Whether you’re creating artwork, greeting cards, or simply preserving them for display, consider the size and shape of the flowers to ensure they fit your desired application.
Protect the flowers: Once pressed, store the tulips in a protective sleeve or frame to prevent them from becoming damaged or discolored over time.
Have patience: Pressing tulip flowers is a time-consuming process that requires patience and attention to detail. Allow yourself plenty of time to complete the pressing process and enjoy the beauty of your preserved blooms for years to come.
Conclusion
Preserving the beauty of tulip flowers through pressing allows us to capture their fleeting elegance and cherish it for years to come. By following the techniques and tips outlined in this guide, you can create stunning pressed tulips that serve as a timeless reminder of nature’s beauty. Whether you’re a seasoned botanical enthusiast or a novice gardener, pressing tulip flowers is a rewarding endeavor that allows you to connect with nature in a meaningful way. So gather your materials, select your favorite tulips, and embark on the journey of pressing these exquisite blooms.


