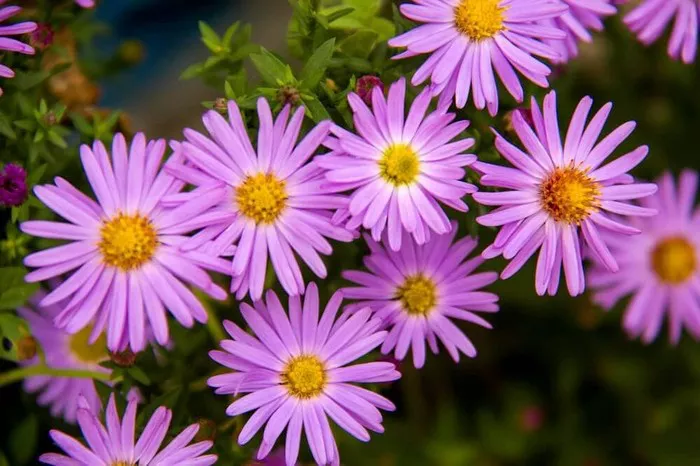
Asters are beloved for their vibrant blooms and ability to brighten up any garden. These resilient perennials come in a variety of colors and sizes, making them a versatile choice for gardeners of all levels. Whether you’re a novice or seasoned gardener, learning how to properly plant aster flowers ensures they thrive and bring joy to your outdoor space year after year. In this guide, we’ll explore everything you need to know about planting asters, from choosing the right location to caring for your new additions.
Choosing the Right Location
Before diving into the planting process, it’s crucial to select an appropriate location for your aster flowers. Asters thrive in areas with full sun to partial shade, so aim to plant them in a spot that receives at least six hours of sunlight per day. Additionally, ensure the soil is well-drained to prevent waterlogging, as asters are susceptible to root rot in overly wet conditions.
When selecting a location, consider the mature size of the aster variety you’ve chosen. Some asters grow tall and may require staking for support, while others form compact mounds ideal for borders or containers. Allow ample space between plants to accommodate their growth and prevent overcrowding.
Preparing the Soil
Once you’ve identified the perfect spot for your asters, it’s time to prepare the soil. Start by removing any weeds or debris from the planting area to give your asters the best possible start. Loosen the soil to a depth of 12-18 inches using a garden fork or tiller, breaking up any clumps and incorporating organic matter such as compost or aged manure.
Asters prefer slightly acidic to neutral soil with a pH range of 6.0 to 7.0. If your soil is too acidic, consider amending it with lime to raise the pH level. Conversely, if the soil is too alkaline, sulfur or peat moss can help lower the pH. A soil test kit from your local garden center can provide valuable insight into your soil’s pH and nutrient levels, guiding your amendment efforts.
Planting Asters
With the soil prepared, it’s time to plant your aster flowers. Follow these steps for successful planting:
1. Digging Holes: Dig holes for your asters that are slightly larger than the root balls of the plants. Space the holes according to the mature size of the asters, typically 12-18 inches apart.
2. Removing Plants from Containers: Carefully remove the aster plants from their containers, taking care not to damage the roots. Gently loosen any compacted roots before planting.
3. Placing in Holes: Place each aster plant in its respective hole, ensuring the top of the root ball is level with the surrounding soil surface. Backfill the holes with soil, gently firming it around the roots to remove air pockets.
4. Watering: After planting, water the asters thoroughly to settle the soil and provide moisture to the roots. Continue to water regularly, keeping the soil evenly moist but not waterlogged, especially during the establishment period.
5. Mulching: Apply a layer of organic mulch, such as shredded bark or straw, around the base of the aster plants. Mulch helps retain moisture, suppresses weeds, and regulates soil temperature, creating an optimal growing environment for your asters.
Caring for Aster Flowers
Proper care is essential for ensuring your aster flowers thrive and continue to dazzle year after year. Here are some tips for caring for your asters:
1. Watering: Asters prefer consistently moist soil, especially during periods of drought. Water deeply once or twice a week, providing approximately 1 inch of water per week during the growing season. Avoid overhead watering, as wet foliage can increase the risk of fungal diseases.
2. Fertilizing: Apply a balanced fertilizer, such as a 10-10-10 NPK formula, in early spring as new growth emerges. Follow the manufacturer’s instructions for application rates, and avoid over-fertilizing, as this can lead to excessive foliage growth at the expense of flower production.
3. Deadheading: Remove spent flowers regularly to promote continuous blooming and prevent the plant from expending energy on seed production. Simply pinch off the faded blooms with your fingers or use pruners to snip them off just above a set of leaves.
4. Staking: Taller varieties of aster may require staking to support their stems and prevent them from flopping over. Install stakes or plant supports early in the growing season, being careful not to damage the roots, and secure the stems as needed with soft ties or twine.
5. Dividing: Over time, aster plants may become overcrowded and benefit from division to rejuvenate growth and improve flowering. Divide mature plants in early spring or late summer, using a sharp shovel to carefully separate the clumps into smaller sections. Replant the divisions in prepared soil and water thoroughly to encourage establishment.
6. Pest and Disease Management: Keep an eye out for common pests such as aphids, spider mites, and powdery mildew, especially during hot, humid weather. Regularly inspect your plants for signs of infestation or disease, and address any issues promptly with appropriate cultural or chemical controls.
Conclusion
With their cheerful blooms and easy-care nature, aster flowers are a delightful addition to any garden. By selecting the right location, preparing the soil, and providing proper care, you can enjoy a bounty of colorful blooms from late summer through fall. Whether planted en masse in borders and beds or tucked into containers on a patio, asters are sure to bring joy and beauty to your outdoor space for years to come. So roll up your sleeves, grab your gardening tools, and start planting aster flowers today!


