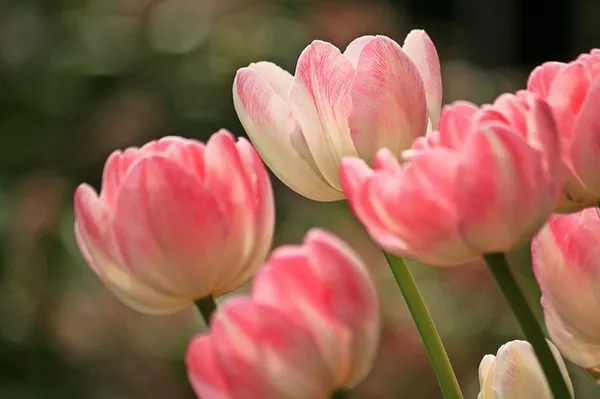
Tulips, with their elegant curves and vibrant colors, are a beloved symbol of springtime. While fresh tulips bring joy to any space, paper tulip flowers offer a timeless beauty that can be enjoyed year-round. Crafting these delicate blooms is not only a creative endeavor but also a relaxing and rewarding activity. In this comprehensive guide, we’ll explore the art of making tulip paper flowers, from selecting materials to mastering techniques that bring these flowers to life.
Materials Needed
Before diving into the crafting process, gather the necessary materials:
Colored Paper: Choose high-quality craft paper in various shades for the petals and leaves. Green paper works well for the stems.
Scissors: Sharp scissors are essential for cutting precise shapes.
Glue Stick or Craft Glue: Opt for a glue stick or craft glue that dries clear for seamless assembly.
Wire: Thin floral wire provides structure for the stems.
Crafting Tools: Optional tools such as a bone folder or scoring tool can aid in shaping petals and leaves.
Template: While not essential, a printable template can simplify the cutting process, especially for beginners.
Step 1: Prepare the Petals
Begin by cutting out tulip petal shapes from the colored paper. You can use a template or freehand the shapes for a more organic look. Each tulip typically consists of six petals arranged in a circular pattern.
To add dimension to the petals, gently curl the edges using your fingers or a round object such as a pencil. This step creates a lifelike curve that mimics the natural shape of tulip petals.
Step 2: Form the Flower Bud
Once the petals are prepared, it’s time to assemble the flower bud. Start by taking one petal and applying a small amount of glue along one edge. Overlap the edges slightly to create a cone shape, securing the glued edge in place. Repeat this process with the remaining petals, positioning them evenly around the center to form a cohesive bud.
As you add each petal, adjust the angle and overlap to achieve a natural-looking arrangement. The center of the bud should remain slightly open, resembling the unopened petals of a real tulip.
Step 3: Construct the Stem
While the flower bud dries, focus on crafting the stem. Cut a length of floral wire to your desired stem height, accounting for any additional length needed for insertion into a vase or arrangement.
Next, cut a strip of green paper for the stem. Apply glue along one edge of the paper and carefully wrap it around the wire, ensuring a snug fit. Trim any excess paper and secure the end with glue.
For added realism, create small creases or bends along the length of the stem using your fingers or a scoring tool. These subtle details mimic the texture of a real tulip stem.
Step 4: Attach the Flower Bud to the Stem
Once both the flower bud and stem are dry, it’s time to join them together. Apply a generous amount of glue to the base of the flower bud and carefully insert the wire stem into the open center. Hold the bud in place until the glue sets, ensuring a secure attachment.
As the glue dries, adjust the angle of the flower bud to your preference. Tulips naturally exhibit a gentle curve in their stems, so feel free to bend the wire slightly for a more realistic appearance.
Step 5: Add Leaves (Optional)
To complete the tulip paper flower, consider adding leaves for a finishing touch. Cut leaf shapes from green paper, making them slightly larger than the flower bud for balance.
Attach the leaves to the stem using glue, positioning them just below the flower bud. Arrange the leaves in a naturalistic manner, alternating their orientation for visual interest.
Step 6: Finishing Touches
Once all components are assembled, take a moment to admire your handiwork. Adjust the petals, stem, and leaves as needed to achieve your desired aesthetic.
If desired, create a bouquet of paper tulip flowers by repeating the above steps for multiple blooms. Arrange the flowers in a vase or container filled with floral foam for stability, or showcase them individually as decorative accents.
For added realism, consider embellishing the paper tulips with subtle details such as painted accents or delicate creases. Experiment with different paper textures and colors to create a diverse array of tulip varieties, from classic reds and yellows to exotic purples and oranges.
Conclusion
Crafting tulip paper flowers offers a delightful way to bring the beauty of nature into your home year-round. Whether you’re a seasoned crafter or a novice enthusiast, this step-by-step guide provides the tools and techniques needed to create stunning paper tulips that capture the essence of spring. With a bit of patience and creativity, you can enjoy the timeless charm of tulip blooms whenever and wherever you please.


