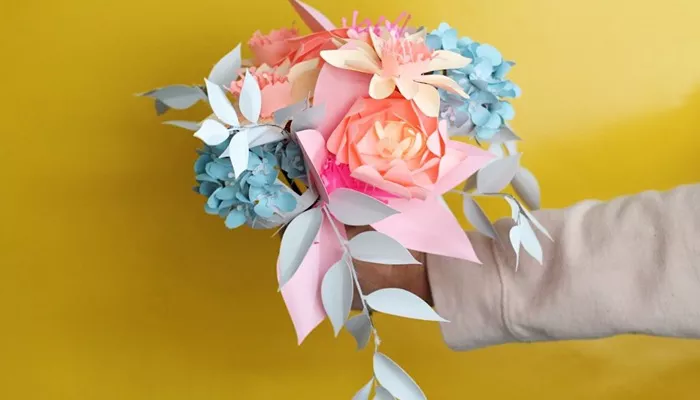
Crafting a paper flower bouquet for a birthday is a wonderful way to add a personal touch to a celebration. Not only are paper flowers versatile and customizable, but they also offer a lasting memento that the recipient can cherish. In this article, we’ll explore the intricate steps involved in creating a paper flower bouquet, from selecting materials to assembling the bouquet. By the end, you’ll have all the knowledge you need to create a stunning and unique paper flower bouquet for any birthday celebration.
Materials and Tools
Before diving into the crafting process, gather all the necessary materials and tools. Here’s a comprehensive list to get you started:
Paper: Choose from a variety of papers such as crepe paper, construction paper, or patterned scrapbook paper. Crepe paper is highly recommended due to its flexibility and ease of manipulation.
Scissors: Sharp scissors are essential for precise cutting.
Glue: A glue gun with glue sticks is ideal for quick and strong adhesion. Alternatively, use craft glue for a more controlled application.
Florist Wire: This is used for the stems of your flowers. Choose the thickness based on the size and weight of your flowers.
Florist Tape: This tape is used to wrap the stems and give them a professional finish.
Greenery: Optional, but adding faux leaves or greenery can enhance the bouquet’s overall appearance.
Ruler and Pencil: For measuring and marking the paper.
Templates: Flower templates can be printed or drawn to guide your cutting.
Step-by-Step Guide to Making Paper Flowers
Choosing Your Flower Designs
Decide on the types of flowers you want to create. Popular choices include roses, peonies, daisies, and tulips. Each flower has its unique construction method, so select designs that match your skill level and preferences. For a birthday bouquet, consider using vibrant and cheerful colors.
Preparing the Paper
Cutting the Petals: Use templates to cut out petal shapes from your chosen paper. For a rose, cut multiple petals in a range of sizes. For a daisy, cut several layers of petals in a circular shape.
Shaping the Petals: Use your fingers or a flower shaping tool to curve and mold the petals. For crepe paper, gently pull and stretch the edges to give them a more natural look. For sturdier paper, you might need to use a bone folder to create curves.
Assembling the Flowers
Center Construction: For flowers like roses, start by creating the flower’s center. Roll a small piece of paper into a tight coil and glue it in place. This will serve as the base for your petals.
Adding Petals: Attach the petals around the center, starting from the innermost layer and working outward. Overlap the petals slightly and use glue to secure them in place. For added realism, use a pencil to curl the petal edges before attaching them.
Creating the Stems: Attach florist wire to the base of the flower using glue. Wrap the wire with florist tape, ensuring that the tape overlaps slightly with the flower base to secure it firmly.
Creating the Bouquet
Arranging the Flowers: Once you’ve made several flowers, start arranging them in a bouquet. Place the largest flowers in the center and the smaller ones around the edges. Experiment with different arrangements until you find one that looks balanced and appealing.
Adding Greenery: Incorporate faux leaves or greenery to add texture and depth to your bouquet. Arrange the greenery around the flowers, ensuring it complements the overall design.
Wrapping the Bouquet: Wrap the stems with florist tape, then use a decorative ribbon or fabric to finish the bouquet. Secure the ribbon with glue or a decorative pin.
Novel Ideas to Enhance Your Paper Flower Bouquet
1. Incorporate Personalized Touches
Add a personal touch to your bouquet by incorporating custom elements such as initials, dates, or small messages on the petals. This can be done with a fine-tip marker or by printing onto the paper before crafting.
2. Experiment with Colors and Textures
Combine different types of paper to create a bouquet with varied textures and colors. For instance, use metallic paper for an elegant touch or textured cardstock for added depth.
3. Add Decorative Elements
Consider adding small embellishments such as glitter, sequins, or faux jewels to your flowers. These details can make the bouquet more festive and eye-catching.
4. Create a Themed Bouquet
Design your bouquet around a specific theme or color scheme that reflects the recipient’s personality or interests. For example, a tropical theme could include vibrant hibiscus flowers and palm leaves.
Tips for Success
Practice Patience: Crafting paper flowers requires time and attention to detail. Take your time with each step to ensure the best results.
Use High-Quality Materials: Investing in good-quality paper and tools can significantly impact the final look of your bouquet.
Keep the Recipient in Mind: Tailor your bouquet to the recipient’s tastes and preferences for a more meaningful gift.
Seek Inspiration: Look for inspiration online or in craft books to gather ideas and techniques that can enhance your bouquet.
see also: How to Turn off Musical Flower Birthday Candle
Conclusion
Creating a paper flower bouquet for a birthday is a rewarding and enjoyable craft project. With a bit of creativity and attention to detail, you can create a beautiful and unique bouquet that adds a personal touch to any celebration. By following the steps outlined in this guide and incorporating novel ideas, you can craft a bouquet that stands out and delights the recipient. Remember, the joy of crafting lies in the process as much as in the finished product. Happy crafting!


