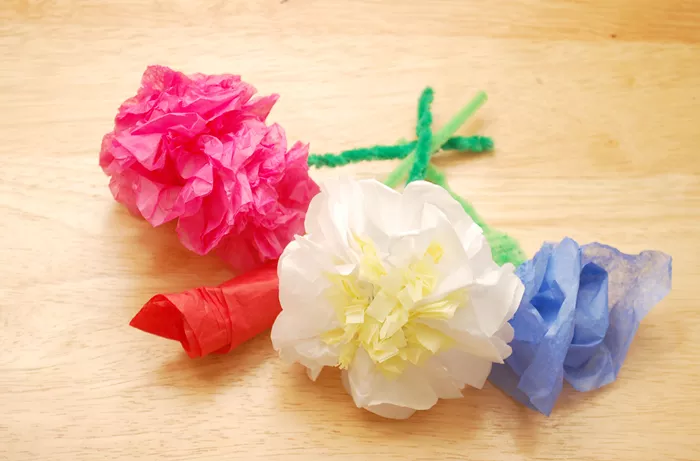
Tissue paper flowers are a beautiful and easy way to add color and charm to any occasion. Whether you’re planning a birthday, wedding, or simply decorating your home, tissue paper flowers can be made quickly and with minimal materials. This simple craft is perfect for all skill levels, from beginners to experienced crafters. In this article, we will explore how to create stunning tissue paper flowers step by step.
What You Need to Get Started
Before starting, it’s important to gather all the necessary materials. Don’t worry; these supplies are easy to find and usually inexpensive. The main things you’ll need are:
Tissue Paper: Choose any color you like. You can also mix different shades for a unique look.
Scissors: A sharp pair is essential for cutting tissue paper without tearing it.
Wire or Pipe Cleaner: This will be used to hold your flower together.
Glue or Tape: Optional, but can help secure some parts of the flower.
Ruler: To measure the size of the tissue paper.
Tissue paper is a versatile crafting material. It comes in a variety of colors, textures, and sizes, allowing you to create a wide range of flowers, from delicate daisies to bold sunflowers.
Step-by-Step Guide to Making Tissue Paper Flowers
Creating tissue paper flowers is an enjoyable and simple process. Here’s a step-by-step guide to help you make beautiful flowers.
Step 1: Cut Tissue Paper into Rectangles
The first step is to cut your tissue paper into rectangles. The size of the rectangle depends on how big you want your flower to be. A common size is 6 inches by 8 inches, but you can adjust this based on your preferences. For a fuller flower, use more layers of tissue paper.
Step 2: Stack the Tissue Paper Layers
Once you’ve cut your tissue paper, stack the layers on top of each other. The more layers you use, the fuller and fluffier your flower will be. Generally, 6-10 layers work well.
Step 3: Accordion Fold the Paper
Next, you’ll fold the tissue paper like an accordion, back and forth. Each fold should be about 1 to 2 inches wide. Continue folding until you reach the end of your tissue paper stack.
Step 4: Secure the Middle of the Accordion
Once the tissue paper is folded, take a wire or pipe cleaner and wrap it tightly around the middle of the folded tissue paper. This will hold everything together and form the base of your flower.
Step 5: Cut the Edges of the Tissue Paper
To give your flower a more natural look, you can shape the edges of the tissue paper. Use your scissors to cut the ends of the folded tissue paper into a rounded or pointed shape. This will create petals that look more realistic.
Step 6: Fluff the Flower
Now, it’s time to carefully pull apart each layer of tissue paper. Start with the top layer and gently separate it from the others. Continue until all the layers are separated, giving your flower a full and fluffy appearance.
Step 7: Adjust the Shape and Petals
Finally, adjust the petals to your liking. You can fluff the layers, reshape them, or even trim the edges for a different effect. Once you’re happy with the shape, your tissue paper flower is ready!
Tips and Tricks for Perfect Tissue Paper Flowers
Mix Colors: You can layer different colors of tissue paper to create vibrant, multicolored flowers.
Use Different Sizes: Varying the sizes of the tissue paper can help you create a more dynamic bouquet.
Make Smaller Flowers: For a unique touch, try making smaller flowers to use as decorations for a cake, gift wrapping, or hair accessories.
Different Types of Tissue Paper Flowers
There are many variations of tissue paper flowers you can create. Some of the most popular types include:
Pom-Poms: These are fluffy and round flowers that look like little clouds.
Roses: Tissue paper roses are elegant and delicate, perfect for weddings or special events.
Daisies: Simple and bright, daisies are easy to make and add a fresh look to any decor.
How to Display Your Tissue Paper Flowers
Once your flowers are made, you can use them in a variety of ways. Display them in a vase, hang them from the ceiling, or attach them to a wreath or garland. You can even use them as part of a table centerpiece or in a party bouquet. The possibilities are endless!
Conclusion
Making tissue paper flowers is a fun and simple craft that can add a personal touch to your home decor or special events. With just a few basic materials and a little creativity, you can create beautiful flowers that are as unique as you are. Whether you’re making them for a celebration or just as a fun hobby, tissue paper flowers are always a great choice.
Frequently Asked Questions (FAQs)
1. How long do tissue paper flowers last?
Tissue paper flowers can last for several weeks if stored properly. Keep them in a cool, dry place and avoid direct sunlight to prevent fading.
2. Can I make tissue paper flowers for outdoor events?
Tissue paper flowers are best suited for indoor use, as they can be damaged by wind and rain. However, you can use weather-resistant spray to help protect them if needed.
3. Can I use different types of paper instead of tissue paper?
While tissue paper is the most common material, you can experiment with other lightweight papers like crepe paper or napkins. These may create different textures and effects.
4. How do I make tissue paper flowers look more realistic?
To make your flowers look more realistic, try cutting the edges of the petals in different shapes, such as scalloped or jagged edges. You can also layer different shades of tissue paper to add depth and dimension.


