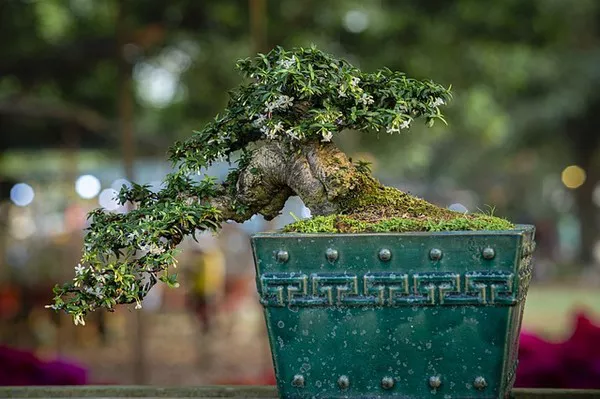
Bonsai, the art of cultivating miniature trees, has been cherished for centuries as a symbol of patience, beauty, and harmony. While acquiring a stunning bonsai tree is a delight, crafting a custom bonsai pot can add a personal touch to your miniature masterpiece. In this knowledge-sharing guide, we will explore the art of making a bonsai pot at home, combining our expertise with a popular science approach to explain the process clearly and informatively. Whether you’re a seasoned bonsai enthusiast or a beginner eager to delve into the world of bonsai, crafting your own pot will add a sense of accomplishment to your journey. So, let’s roll up our sleeves and embark on this bonsai pot-making adventure together!
Understanding the Importance of a Bonsai Pot
A bonsai pot serves not only as a decorative element but also as a functional vessel that provides the perfect environment for your miniature tree to thrive. Bonsai pots are designed to control the growth of the tree’s roots, allowing for precise water retention and drainage. The shallow nature of bonsai pots also encourages the development of a strong root system, essential for the health and longevity of your bonsai. Additionally, the aesthetics of the pot complement the beauty of the bonsai, creating a harmonious and captivating display.
Gathering Materials and Tools
Before you begin crafting your bonsai pot, gather the necessary materials and tools. You will need clay or ceramic material suitable for pottery, water, a work surface, a potter’s wheel or flat surface for hand-building, a clay cutter, a sponge, a wooden modeling tool, and a fine-grit sandpaper for finishing touches. Ensure the clay you choose is suitable for your bonsai’s needs and can withstand outdoor conditions if you plan to display your bonsai outside.
Hand-Building or Pottery Wheel
Crafting a bonsai pot can be achieved through hand-building or using a potter’s wheel. Hand-building is a method that allows for more creative freedom and unique pot shapes, while a potter’s wheel offers precision and symmetry. If you’re new to pottery, hand-building might be a great starting point as it requires minimal tools and allows you to experiment with different designs. If you’re experienced with a potter’s wheel, you can create refined and symmetrical pots.
Building the Bonsai Pot
Once you’ve chosen your preferred method, begin building the bonsai pot. For hand-building, start by kneading the clay to remove air bubbles and create a smooth texture. Roll the clay into a ball and flatten it to create the base of the pot. Use your wooden modeling tool to gently shape the walls of the pot, ensuring they are of consistent thickness. You can create decorative patterns or textures on the surface for added aesthetic appeal.
If using a potter’s wheel, center the clay and slowly shape it into the desired form. Use gentle pressure to create a shallow and wide container with a drainage hole at the bottom. Keep in mind that a well-designed drainage hole is crucial for the health of your bonsai.
Trimming and Finishing Touches
Once your pot has taken shape, it’s time to trim and refine the edges. Use the clay cutter to trim any excess clay and create clean edges. Smooth the surface with a sponge, ensuring there are no rough spots or imperfections. Pay attention to the bottom of the pot to ensure it sits flat and stable.
Drying and Firing
After you’ve finished building your bonsai pot, let it dry thoroughly before firing it in a kiln. Proper drying is essential to prevent cracking during firing. Once dry, fire the pot in a kiln at the appropriate temperature for the type of clay you’ve used. Firing will solidify the pot, making it durable and suitable for displaying your beloved bonsai.
Glazing (Optional)
Glazing your bonsai pot is an optional step that can enhance its appearance and protect the surface. Choose a glaze that complements your bonsai and apply it following the manufacturer’s instructions. Glazing provides a glossy or matte finish and can add vibrant colors or subtle textures to the pot.
Displaying Your Bonsai
Once your custom bonsai pot is complete and glaze (if applied) is dry, it’s time to display your bonsai with pride. Place your miniature tree into the pot, ensuring its roots fit comfortably within the container. Add the appropriate bonsai soil mixture and gently pat it down to secure the tree in place. With your bonsai pot displayed, admire the beauty of your creation and the harmony it brings to your cherished bonsai.
Conclusion:
Crafting a bonsai pot at home is a gratifying experience that allows you to connect intimately with your bonsai and showcase your creativity. By following the steps in this guide and utilizing the right materials and techniques, you can create a functional and aesthetically pleasing pot to complement your miniature tree’s beauty. Remember that practice and experimentation are essential, and each pot you make will add to your growing expertise. Embrace the art of bonsai pot-making as an integral part of your bonsai journey, and let the harmonious relationship between your handmade pot and cherished bonsai flourish over time.


