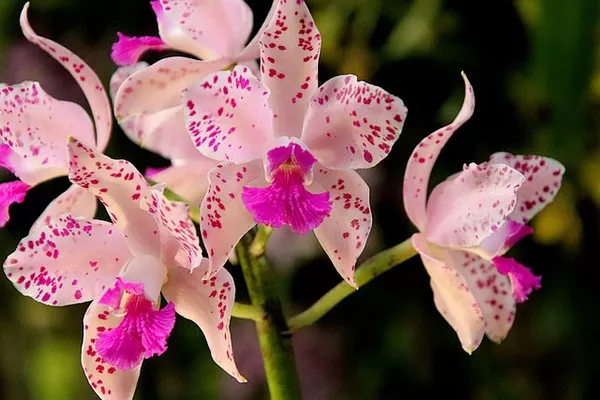
Drying flowers is a timeless art that allows us to preserve the beauty and essence of nature’s blooms long after they have been cut. Traditionally, air-drying and pressing have been popular methods, but modern technology offers a faster and more efficient alternative: drying flowers in the microwave. Microwave drying enables us to preserve flowers with their vibrant colors and shapes intact, making them perfect for crafts, decorations, and sentimental keepsakes. In this article, we will provide you with a step-by-step guide to successfully drying flowers in the microwave and some essential tips to ensure the process is both safe and effective.
Selecting the Right Flowers for Microwave Drying
Before starting the drying process, it’s essential to choose the right flowers for microwave drying. Not all flowers are suitable for this method, as some may not retain their shape or color. Ideal flowers for microwave drying include roses, daisies, marigolds, zinnias, and other sturdy varieties that do not have thick or succulent stems.
Preparing the Flowers
Proper preparation of the flowers is crucial to achieve successful results. Follow these steps to prepare your flowers for microwave drying:
1. Harvest Flowers: Choose fresh, fully bloomed flowers with no signs of wilting or damage. Harvest them in the morning when their water content is at its lowest to ensure optimal drying.
2. Remove Excess Foliage: Trim away any leaves or excess foliage from the stems. This reduces the moisture content and helps the flowers dry more evenly.
3. Trim Stems: Cut the stems at an angle using a sharp pair of scissors or pruning shears. The angled cut increases the surface area for water evaporation.
4. Bundle Flowers: Gather a few flowers together in a small bundle, securing them with a rubber band or string. Keeping them in small bundles ensures even drying and prevents overcrowding in the microwave.
Microwave Drying Process
Now that your flowers are prepared, it’s time to begin the microwave drying process. Follow these steps carefully:
1. Choose a Microwave-Safe Container: Select a microwave-safe container, such as a glass or ceramic dish, with enough room to accommodate the flower bundles without crowding.
2. Line the Container: Place a layer of microwave-safe paper towels or a microwavable plate liner at the bottom of the container. This helps absorb excess moisture during the drying process.
3. Place the Flower Bundles: Arrange the flower bundles on the paper towel or plate liner, ensuring they do not touch each other or the sides of the container.
4. Microwave in Short Intervals: Set your microwave to a low power setting, typically around 30-40% power. Start by microwaving the flowers in short intervals, such as 20 to 30 seconds.
5. Check and Rotate: After each interval, carefully check the flowers for any signs of scorching or overheating. Rotate the flower bundles to ensure even drying.
6. Adjust Microwave Time: The total drying time can vary depending on the flower type, microwave wattage, and the number of flowers being dried. Most flowers will take around 2 to 4 minutes of microwaving in total.
7. Let Flowers Cool: Once the drying process is complete, remove the flowers from the microwave and let them cool for a few minutes before handling.
Tips for Successful Microwave Drying
To achieve the best results when drying flowers in the microwave, keep the following tips in mind:
1. Avoid High Power Settings: Using a low power setting is crucial to prevent the flowers from scorching or overheating. High power settings can cause the flowers to lose their colors and shapes.
2. Test with a Few Flowers: If you are trying the microwave drying method for the first time, experiment with a small batch of flowers to determine the optimal drying time for your specific microwave.
3. Patience is Key: Microwave drying is a delicate process that requires patience and attention. Take your time and avoid rushing the process to ensure the best outcome.
4. Adjust Flower Positioning: If you notice some flowers drying faster than others, you can rearrange them during the process to ensure even drying.
5. Store Dried Flowers Properly: Once the flowers are fully dried, store them in an airtight container or a sealed plastic bag to protect them from moisture.
Post-Drying Care
After successfully drying your flowers in the microwave, you can use them for various creative purposes:
1. Crafting: Dried flowers make excellent additions to crafts such as greeting cards, pressed flower art, and decorative displays.
2. Home Decor: Incorporate dried flowers into your home decor by creating unique flower arrangements, wreaths, or framed artwork.
3. Keepsakes: Dried flowers hold sentimental value, making them perfect for preserving the memory of special occasions like weddings or anniversaries.
Conclusion
Drying flowers in the microwave offers a quick and efficient method to preserve the beauty and elegance of nature’s blooms. By carefully selecting the right flowers, properly preparing them, and following the microwave drying process with patience and attention, you can create stunning dried flowers that retain their vibrant colors and shapes. Whether used for crafting, home decor, or sentimental keepsakes, these dried flowers will serve as lasting reminders of nature’s beauty and the joy it brings to our lives.


