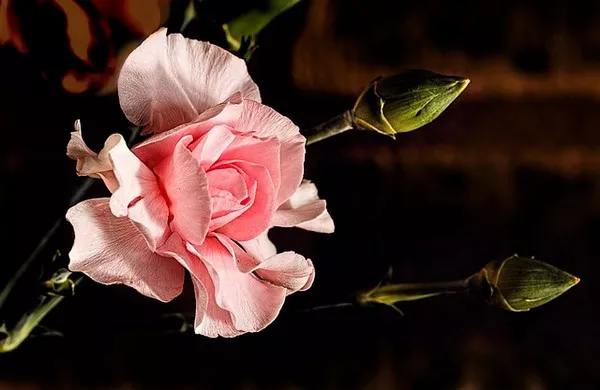
Dried flowers have long been cherished for their timeless beauty and the ability to retain their delicate forms long after they’ve been plucked from the garden. However, for those who desire to infuse a burst of color into their dried floral arrangements, the art of dyeing dried flowers offers a creative and transformative solution. Whether you’re an experienced florist or a passionate DIY enthusiast, this comprehensive guide will walk you through the steps of dyeing dried flowers, helping you create stunning, personalized arrangements that exude vibrancy and charm.
The Benefits of Dyeing Dried Flowers
Dyeing dried flowers opens up a world of possibilities, enabling you to:
Customize Your Decor: Inject your personal style and aesthetic preferences into your floral arrangements by choosing the colors that resonate with you.
Repurpose Old Bouquets: Revitalize dried flower bouquets from past occasions or give a new lease of life to faded blooms.
Create Seasonal Decor: Coordinate your dried flowers with the changing seasons and holidays, making your home feel warm and inviting year-round.
Enhance Gift-Giving: Offer unique, hand-dyed dried flower arrangements as heartfelt and visually stunning gifts to friends and loved ones.
Materials You’ll Need
Before we delve into the dyeing process, gather the following materials:
Dried Flowers: Choose high-quality dried flowers with sturdy stems and petals that are fully intact. Common choices include roses, hydrangeas, baby’s breath, and lavender.
Fabric Dye: Opt for a reputable fabric dye in your desired color(s). Water-based fabric dyes work well for this purpose.
Plastic Containers: Use plastic containers or bowls to mix and hold the dye. Make sure they are large enough to comfortably accommodate your flowers.
Water: You’ll need water to dilute the dye and submerge your dried flowers.
Plastic Gloves: Protect your hands from staining by wearing plastic gloves.
Stirring Sticks: Wooden or plastic stirring sticks will help you mix the dye solution thoroughly.
Drying Rack or Paper Towels: Allow dyed flowers to dry on a rack or lay them on paper towels to avoid color bleeding.
Step-by-Step Guide to Dyeing Dried Flowers
Now, let’s break down the process of dyeing dried flowers into easy-to-follow steps:
Step 1: Prepare Your Work Area
Set up a clean and well-ventilated workspace to avoid accidental spills and ensure proper air circulation while working with dyes. Cover the surface with newspaper or a disposable tablecloth to protect it from potential stains.
Step 2: Mix the Dye Solution
Follow the instructions on the fabric dye packaging to prepare the dye solution. Typically, this involves diluting the dye in water to create a mixture that will immerse your dried flowers. Make sure to wear plastic gloves during this step to protect your hands.
Step 3: Submerge the Flowers
Gently submerge your dried flowers into the prepared dye solution. You can choose to dye all the flowers at once or work in batches if you want to create a variety of colors.
Step 4: Monitor the Soaking Time
The duration of soaking time can vary depending on the type of flower and the desired color intensity. Start with a shorter soaking time, around 10-15 minutes, and check the flowers periodically until you achieve the desired hue. Keep in mind that the color may deepen slightly as the flowers dry.
Step 5: Rinse and Dry
Once you’re satisfied with the color, remove the flowers from the dye solution and rinse them gently under cold running water. This helps remove any excess dye and prevents color bleeding. Allow the dyed flowers to dry on a rack or paper towels. Be patient; this can take several hours to a full day.
Step 6: Arrange Your Dyed Flowers
Now that your dried flowers are dyed and dried, it’s time to get creative. Arrange them into stunning bouquets, wreaths, or other decorative pieces. Mix and match colors and flower varieties to achieve your desired aesthetic.
Pro Tips for Dyeing Dried Flowers
Here are some additional tips and tricks to ensure your dyeing process is successful:
Test a Sample: Before dyeing an entire batch of flowers, it’s a good idea to test the dye on a single flower to gauge the color outcome.
Use Warm Water: When preparing the dye solution, using warm water can help the dye absorb more effectively into the flowers.
Experiment with Techniques: Get creative with different dyeing techniques like ombre, tie-dye, or dip-dye to achieve unique and eye-catching results.
Preserve the Color: To help the color last longer, keep your dyed dried flowers out of direct sunlight, as prolonged exposure to UV rays can cause fading.
Mix Dye Colors: Experiment with mixing different dye colors to create custom shades that complement your decor or theme.
Seal with Hairspray: For added protection and to reduce color transfer, consider lightly spraying your dyed flowers with a clear hairspray.
Conclusion
Dyeing dried flowers is a wonderful way to breathe new life and color into your floral arrangements, allowing you to express your creativity and make a personalized statement. With the right materials and a little patience, you can transform ordinary dried flowers into vibrant, eye-catching decor pieces that will continue to captivate and charm for years to come. So, roll up your sleeves, gather your supplies, and let your imagination bloom as you embark on the journey of dyeing dried flowers.


