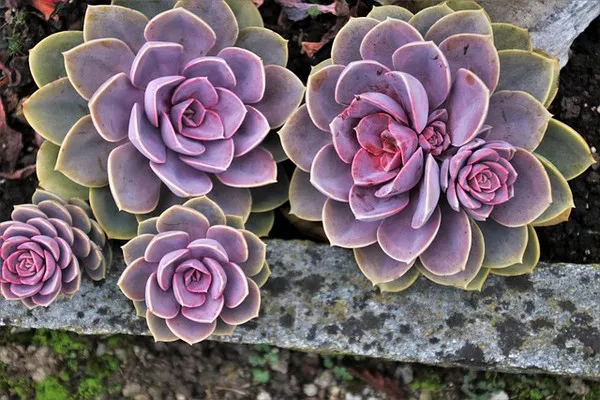
Succulents have taken the world of indoor gardening by storm, and it’s not hard to see why. These hardy, low-maintenance plants come in a stunning array of shapes, sizes, and colors, making them the perfect addition to any living space. While succulents can be easily grown from seeds or purchased from a nursery, there’s something uniquely rewarding about propagating them from cuttings. Not only does it allow you to create new plants from your existing collection, but it also offers an opportunity to witness the fascinating process of growth and regeneration. In this comprehensive guide, we will explore the art of propagating succulents from cuttings, step by step.
Understanding Succulent Anatomy
Before we delve into the propagation process, it’s essential to familiarize ourselves with succulent anatomy. Succulents are known for their ability to store water in their leaves, stems, or roots, which makes them incredibly drought-tolerant. This water storage capacity is what allows us to propagate them from cuttings.
Leaf Cuttings: This is the most common method of propagating succulents. It involves taking a healthy leaf cutting from the parent plant and allowing it to root and grow into a new plant. Not all succulents can be propagated through leaf cuttings, but many popular species like Echeveria, Sedum, and Crassula are well-suited to this method.
Stem Cuttings: Some succulents, such as cacti and some types of Euphorbias, can be propagated from stem cuttings. Stem cuttings are particularly useful when the parent plant has a long stem or when you want to propagate a specific section of the plant.
Offsets: Many succulents, such as Sempervivum and Aloe, produce offsets, also known as “pups” or “babies,” around the base of the parent plant. These offsets can be separated and potted up to create new plants.
Materials You’ll Need
To successfully propagate succulents from cuttings, you’ll need a few essential materials. Here’s a list to get you started:
Healthy Parent Plant: Choose a mature, healthy succulent with no signs of disease or damage. The quality of the parent plant greatly influences the success of your propagation.
Sharp, Clean Scissors or Pruners: To take clean cuttings without causing harm to the parent plant.
Drying Time: A small container or tray to let your cuttings dry and callus for a day or two before planting. This helps prevent rot.
Well-Draining Potting Mix: A cactus or succulent-specific potting mix or a mix of regular potting soil and perlite is ideal. You can also make your mix by combining sand, perlite, and peat moss in equal parts.
Pots or Containers: Small pots or containers for planting your cuttings. Ensure that they have drainage holes to prevent waterlogging.
Spray Bottle: To mist your cuttings as they establish roots.
Step-by-Step Guide to Propagating Succulents from Cuttings
Now that you have gathered your materials let’s dive into the process of propagating succulents from cuttings.
Select the Cutting Type:
Leaf Cuttings: Choose a healthy leaf from the parent plant. Use sharp, clean scissors or pruners to make a clean cut. Be sure to select a leaf that is plump and undamaged.
Stem Cuttings: Similar to leaf cuttings, use sharp scissors or pruners to make a clean cut. You can cut a section of the stem and let it callus before planting.
Allow Cuttings to Callus:
Place your cuttings in a dry location for a day or two, allowing the cut ends to form a callus. This step is crucial as it prevents rot when the cuttings are planted.
Plant Your Cuttings:
Fill your small pots or containers with well-draining potting mix.
For leaf cuttings, insert the cut end into the soil, burying it about 1/4 to 1/2 inch deep. For stem cuttings, plant them about an inch deep.
Water sparingly to avoid overwatering, which can cause rot. A light mist using a spray bottle is usually sufficient.
Provide Adequate Light:
Place your newly planted cuttings in a location with bright, indirect sunlight. Avoid direct sunlight initially, as it can scorch the delicate cuttings.
Care for Your Cuttings:
Mist your cuttings lightly every few days to keep the soil slightly moist but not soggy.
After a few weeks, you should start to notice roots forming and new growth emerging from the cuttings.
Transplanting:
Once your cuttings have established roots and show some growth, it’s time to transplant them into larger pots or your garden. This can take several weeks to a few months, depending on the type of succulent.
Maintain Proper Care:
Continue to care for your new succulents as you would for mature plants. Ensure they receive adequate sunlight, well-drained soil, and infrequent watering.
Common Mistakes to Avoid
While propagating succulents from cuttings is relatively straightforward, it’s essential to be aware of common mistakes to maximize your success:
Overwatering: Succulents are susceptible to root rot, so be cautious not to overwater. Allow the soil to dry out between waterings.
Lack of Sunlight: Succulents need adequate sunlight to thrive. Ensure your cuttings receive the right amount of indirect light.
Using Unsuitable Soil: Plant your cuttings in well-draining soil to prevent waterlogged roots.
Neglecting the Callusing Stage: Skipping the callusing step can lead to rotting cuttings.
Conclusion
Propagating succulents from cuttings is a satisfying and cost-effective way to expand your collection of these beautiful, low-maintenance plants. With the right materials, a bit of patience, and a touch of green-thumb magic, you can transform a single succulent into a thriving family of succulents. Whether you’re a seasoned gardener or a newbie, this method of propagation is accessible and enjoyable, allowing you to share the joy of succulents with friends and family. So, roll up your sleeves, grab your pruners, and start propagating your succulents today!


