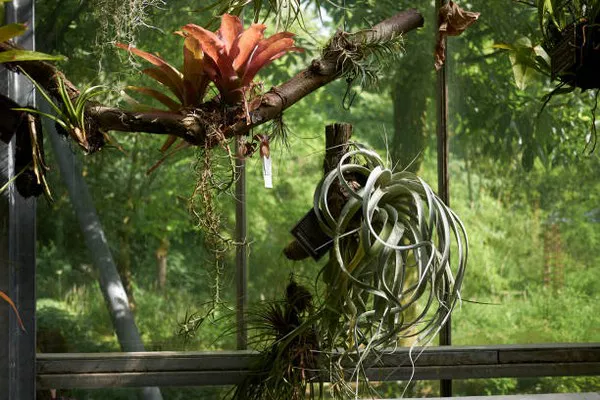
Air plants, scientifically known as Tillandsia, captivate with their unique ability to thrive without soil and minimal care. While most enthusiasts are familiar with propagating air plants through offsets or pups, growing them from seeds provides a rewarding and fascinating alternative. In this comprehensive guide, we explore the step-by-step process of cultivating air plants from seeds, unlocking the secrets of germination, nurturing, and successful growth.
Understanding Air Plant Seeds
Before embarking on the journey of growing air plants from seeds, it’s essential to understand the nature of the seeds themselves. Air plant seeds are incredibly small and lightweight, resembling dust-like particles. They are equipped with fine hairs, enabling them to be carried by the wind. Due to their delicate nature, air plant seeds require specific conditions to germinate successfully.
Materials and Equipment
Air Plant Seeds: Acquire high-quality Tillandsia seeds from reputable suppliers. Select a variety that aligns with your preferences, as air plants come in various species and forms.
Growing Medium: Create a suitable growing medium by combining fine orchid bark, perlite, and sphagnum moss in equal parts. This mixture provides adequate aeration and moisture retention.
Containers: Use shallow trays or small pots with drainage holes to sow the seeds. Ensure the containers are clean and sterile to prevent the growth of harmful molds or bacteria.
Watering Tools: Employ a fine mist spray bottle for gentle watering, maintaining the necessary moisture without drowning the delicate seeds.
Transparent Lid or Plastic Wrap: Cover the containers with a transparent lid or plastic wrap to create a humid environment that promotes germination.
Grow Lights or Natural Light Source: Provide ample light for seedlings, either through a grow light setup or by placing them in a well-lit area with indirect sunlight.
Step-by-Step Guide to Growing Air Plants from Seeds
Step 1: Prepare the Growing Medium
In a clean container, combine fine orchid bark, perlite, and sphagnum moss in equal parts. Thoroughly mix the components to create a well-balanced and aerated growing medium. Ensure that the mixture is damp but not waterlogged.
Step 2: Sow the Seeds
Sprinkle the air plant seeds evenly over the surface of the prepared growing medium. Due to their minuscule size, it’s crucial to distribute them as evenly as possible to avoid overcrowding.
Step 3: Press Seeds into the Medium
Gently press the air plant seeds into the growing medium using a clean, flat tool or your fingertips. This step enhances seed-to-soil contact, promoting successful germination.
Step 4: Cover and Create a Humid Environment
Cover the containers with a transparent lid or plastic wrap to create a humid environment. This step mimics the natural conditions under which air plant seeds germinate in the wild.
Step 5: Provide Indirect Light
Place the containers in a location with indirect light or under a grow light setup. While air plants thrive in bright conditions, direct sunlight can be too intense for the delicate seedlings.
Step 6: Maintain Consistent Moisture
Regularly mist the growing medium with water to maintain consistent moisture. Avoid overwatering, as excessive moisture can lead to mold and root rot. The goal is to keep the medium consistently damp.
Step 7: Patience is Key
Germination of air plant seeds can be a slow process, taking several weeks to months. Be patient and resist the temptation to disturb the containers. Monitor the moisture levels and adjust as needed.
Step 8: Transplanting Seedlings
Once the seedlings have developed into small plants with a few leaves, they can be carefully transplanted into individual pots. Use a mix of orchid bark and perlite for the new containers.
Step 9: Gradual Acclimatization
After transplanting, gradually acclimate the young air plants to the typical conditions they will experience in your care. Increase the light exposure and reduce humidity over time to encourage healthy growth.
Step 10: Regular Care and Maintenance
Continue caring for your air plants by providing bright, indirect light, and watering them by misting or soaking. As they mature, they will produce offsets or pups, contributing to the next generation of air plants.
Tips for Success
Quality Seeds: Start with high-quality air plant seeds from reliable sources to ensure a better chance of successful germination.
Patience: Germinating air plant seeds can be a slow process, so patience is essential. Avoid disturbing the containers during the germination period.
Consistent Moisture: Maintain consistent moisture levels by misting regularly, but avoid overwatering. Proper moisture is critical for successful seedling development.
Sterile Environment: Keep the growing environment clean and sterile to prevent the growth of harmful molds or bacteria that could jeopardize the seedlings.
Ideal Light Conditions: Provide the right balance of light – enough to support growth but not too intense to cause stress or damage to the delicate seedlings.
Conclusion
Growing air plants from seeds is a captivating journey that allows enthusiasts to witness the entire life cycle of these fascinating plants. By understanding the specific needs of air plant seeds and following a careful and patient approach, you can successfully cultivate these ethereal plants from the tiniest of beginnings. Embrace the process, and you’ll be rewarded with the joy of nurturing air plants from seed to maturity.


