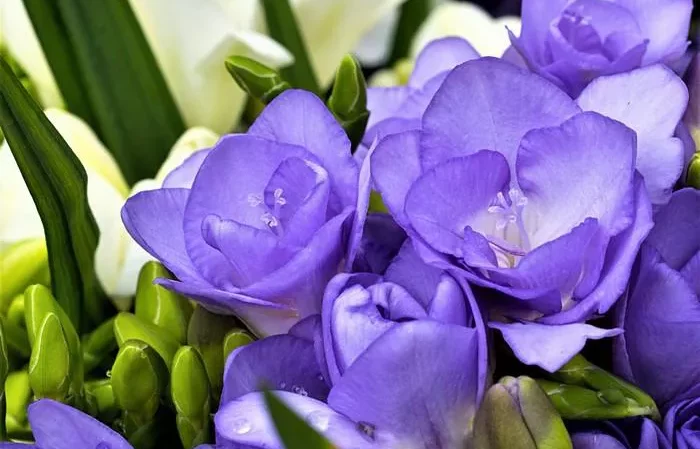
Freesias are exquisite flowering plants known for their vibrant and fragrant blooms. As the flowering season comes to an end, many gardeners find themselves wondering what steps to take with freesia bulbs to ensure a bountiful display in the following seasons. This article aims to provide a comprehensive guide on post-flowering care for freesia bulbs, offering valuable insights into digging up, storing, dividing, and rejuvenating these delightful plants.
Understanding Freesia Bulbs: A Brief Overview
Before delving into post-flowering care, it’s crucial to understand the lifecycle of freesia bulbs. Freesias are perennials that go through a growth and dormancy cycle. The flowering period is a spectacle of colors and fragrances, but as the blooms fade, the plant begins preparing for dormancy. During this phase, the energy shifts from flowering to bulb development.
Post-Flowering Care: Step-by-Step Guide
1. Timing is Key: When to Dig Up Freesia Bulbs
The first step in caring for freesia bulbs after flowering is to choose the right time for digging them up. Ideally, this should be done once the foliage has turned yellow and starts to wither. Waiting too long may lead to nutrient depletion, affecting the bulb’s health.
2. Gently Lift and Clean: Digging Up Freesia Bulbs
When lifting freesia bulbs, it’s essential to do so gently to avoid damage. Use a garden fork or trowel to carefully lift the bulbs from the soil. Once unearthed, shake off excess soil and inspect the bulbs for any signs of disease or damage.
3. Drying and Cleaning: Preparing Bulbs for Storage
After lifting the bulbs, allow them to dry naturally in a shaded, well-ventilated area. This process is crucial for preventing mold and rot during storage. Once dried, remove any remaining foliage and trim the roots, leaving a small portion intact.
4. Storage Conditions: Creating the Ideal Environment
Proper storage is paramount to the success of your freesia bulbs. Choose a cool, dry place with good air circulation. Many gardeners opt for mesh bags or wooden crates for storing bulbs, as they allow airflow and prevent condensation.
5. Division for Renewal: Enhancing Bulb Vitality
Dividing freesia bulbs is a key practice for maintaining their vitality and ensuring a profusion of blooms in the next growing season. Learn how to carefully divide bulbs, ensuring each section has a healthy portion of roots and shoots. This process not only rejuvenates the plant but also allows for propagation.
6. Inspecting for Pests and Diseases: Preserving Bulb Health
Before storage or planting, thoroughly inspect freesia bulbs for any signs of pests or diseases. Common issues include fungal infections and bulb-feeding insects. Treat affected bulbs with appropriate solutions to prevent the spread of these problems to the entire collection.
Advanced Care Techniques: Going Beyond the Basics
1. Soil Enrichment: Preparing for the Next Season
Enhance the fertility of the soil before replanting freesia bulbs. Incorporate well-rotted compost or a balanced bulb fertilizer to provide the necessary nutrients for robust growth. Freesias thrive in well-draining soil, so amending heavy or clayey soil is particularly important.
2. Forced Bulb Techniques: Accelerating Blooming
For those eager to enjoy freesia blooms earlier in the season, consider employing forced bulb techniques. This involves manipulating the bulb’s environment to encourage early flowering. Learn the intricacies of forcing freesia bulbs and the potential benefits and drawbacks of this approach.
3. Container Gardening: A Space-Saving Alternative
Freesias adapt well to container gardening, offering a space-saving option for those with limited garden space. Explore the nuances of growing freesias in containers, from selecting the right potting mix to proper watering and feeding routines. Container gardening also facilitates easier bulb management and allows for strategic placement to enhance aesthetic appeal.
4. Disease Prevention Strategies: Safeguarding Your Freesias
Implementing preventive measures is essential for protecting freesias from common diseases. From proper spacing to regular sanitation practices, discover effective strategies to minimize the risk of fungal infections and other ailments that can compromise the health of your freesia bulbs.
Troubleshooting Common Issues: A Gardener’s Handbook
1. Yellowing Foliage: Decoding Nutrient Deficiencies
Yellowing freesia foliage is a common concern among gardeners. Unravel the mysteries behind this issue, identifying potential nutrient deficiencies and exploring corrective measures to restore the plant’s vigor.
2. Stunted Growth: Addressing Root-Related Problems
Stunted growth can be attributed to various root-related issues. Investigate potential causes such as compacted soil, poor drainage, or root rot, and learn how to address these problems effectively to promote healthy freesia development.
3. Lack of Blooms: Unlocking the Secrets to Flowering Success
For gardeners disappointed by a lack of blooms, delve into the factors influencing freesia flowering. From sunlight requirements to bulb depth and proper planting techniques, uncover the secrets to ensuring a vibrant and abundant display of freesia blooms.
Conclusion
Caring for freesia bulbs after flowering is a rewarding endeavor that sets the stage for a vibrant and fragrant garden in the seasons to come. From digging up and storing bulbs to division and advanced care techniques, each step plays a crucial role in the overall health and longevity of these delightful plants. Armed with the knowledge provided in this comprehensive guide, gardeners can confidently navigate the post-flowering phase, ensuring their freesias flourish with renewed vitality and beauty year after year.


